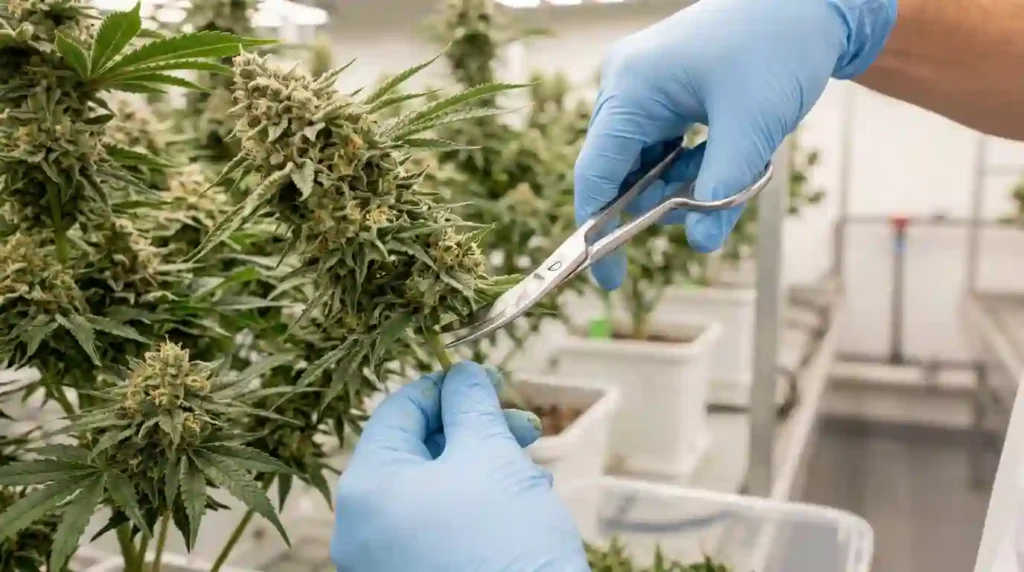
If you have ever grown any plant from seed to full maturity, you know that the final stage, the harvest, is both the most satisfying and the most nerve-wracking part of the whole journey. Get it right and all your effort pays off. Rush it or make a simple mistake, and weeks of careful work can be wasted.
Cannabis plants are no different from other crops in that respect. Whether you think of it like harvesting tomatoes, sunflowers, or herbs from a garden, the timing and cutting technique you use at harvest genuinely matters. Cut too early and the plant has not reached its peak. Wait too long and quality begins to decline. Cut with the wrong technique and you can damage the structure of the plant or introduce problems during the drying stage.
This guide walks you through everything a beginner needs to understand about cannabis harvesting methods and cutting techniques. You will learn how to read the plant’s signals, how to actually make the cuts, what tools to use, and what common mistakes to avoid. By the end, you should feel confident and prepared, not confused or overwhelmed.
Understanding the Cannabis Plant Before You Harvest
Before you pick up a pair of scissors, it helps to understand a little about what you are actually dealing with.
Cannabis is a flowering plant. Like many flowering plants, it goes through distinct life stages: germination, vegetative growth, and flowering. The flowering stage is when the plant produces the buds, or colas, that growers are focused on. After the flowering stage reaches its end, the plant is ready for harvest.
One key thing to understand is that cannabis does not give you one obvious signal, like a fruit changing color, to tell you it is ready. Instead, you have to look at several indicators together. Getting comfortable with reading those signs is the foundation of good harvesting.
How to Know When Your Plant Is Ready
There are three main things experienced growers check before they start cutting.
Trichome color. Trichomes are tiny, mushroom-shaped structures on the surface of the buds and leaves. They look like tiny crystals or frost. The easiest way to see them clearly is with a jeweler’s loupe or a small digital microscope. Early in the flowering stage, trichomes are clear and translucent. As the plant matures, they shift to a milky white color. When most trichomes appear milky, the plant is reaching peak maturity. Eventually, they will start turning amber. A higher ratio of amber trichomes generally means the plant has passed peak maturity.
Most growers aim for a mix of mostly milky trichomes with a small percentage of amber, depending on the result they are looking for from that particular plant. This is the most reliable indicator experienced growers use.
Pistil color. Pistils are the small, hair-like structures that emerge from the buds. Early in flowering, they are white. As the plant matures, they darken and curl inward, turning orange, red, or brown. When 70 to 90 percent of the pistils have darkened and curled, that is another sign the plant is approaching harvest time.
Overall bud development. The buds should look dense and fully formed, not sparse or airy. The calyxes, which are the small pod-like structures that make up the bud, should be swollen.
No single indicator tells the whole story. Experienced growers look at all three together, and trichome inspection is generally the most accurate of the three.
Preparing for Harvest Day
Good preparation makes the cutting process much smoother. Think of it the same way you would prepare to harvest vegetables from a garden. You want the right tools, clean hands, and a clear plan.
Tools You Will Need
- Sharp pruning shears or trimming scissors (clean and sanitized)
- Isopropyl alcohol for cleaning your tools between cuts
- Gloves (resin from cannabis plants is extremely sticky and will coat your hands)
- Drying line, hangers, or a drying rack
- A clean, dim space with good airflow for drying
Sharp tools are non-negotiable. Dull scissors crush plant tissue rather than making a clean cut, which can create entry points for mold and bacteria. Think of it like cutting fresh herbs in the kitchen: a sharp knife gives a clean cut that stays fresh, while a dull one bruises the plant material.
Should You Flush Before Harvest?
Some growers choose to stop giving their plants any nutrients for the final week or two before harvest and water with plain water only. This practice is often called flushing. The idea is to encourage the plant to use up any stored minerals. Whether or not flushing makes a meaningful difference is a topic that growers genuinely debate, but it is worth knowing the practice exists if you come across it.
Darkness Before the Cut
Many experienced growers choose to harvest their plants at the end of a dark period, before the lights come on for the day (for indoor grows). The idea behind this is that plants tend to have slightly higher concentrations of certain compounds in the early morning before light exposure begins. While the scientific evidence on this is not absolute, it is a widely followed practice and does no harm.
Step-by-Step Cutting Techniques for Cannabis Harvest
Now for the actual cutting. There are two main harvesting methods growers use, and which one you choose depends on your setup, the size of your plant, and how much space you have for drying.
Method 1: Whole Plant Harvest
This is the most common approach for beginners because it is straightforward.
Step 1: Cut the main stem at the base of the plant, as close to the soil line as possible. Use your pruning shears and make a single, clean cut. Do not saw back and forth.
Step 2: Hang the entire plant upside down from a line or hook in your drying space. Hanging upside down allows the plant to dry evenly and lets moisture from the stem move down through the buds gradually.
Step 3: Leave large fan leaves attached during drying if you have high humidity in your drying space. The leaves slow the drying process slightly, which can result in a better cure. In dry climates, many growers remove the large fan leaves before hanging.
Step 4: Allow the plant to hang for seven to fourteen days, depending on your environment. More on drying conditions below.
This method is best when you have a smaller plant or a plant with one dominant main cola.
Method 2: Branch-by-Branch Harvest
This approach is better suited for larger plants with many branches, or when you want to harvest the plant in stages (top buds often mature faster than lower buds).
Step 1: Starting at the top of the plant, cut individual branches at a point just below where the bud structure begins. Leave a small section of stem on each branch, about two to three inches. This stem gives you something to hang the branch from.
Step 2: Work your way down the plant systematically, cutting one branch at a time. Place cut branches gently in a clean container or hang them immediately.
Step 3: If you are harvesting in stages, you can leave the lower branches on the plant for an additional week or more to let them continue maturing. This is sometimes called a staggered or progressive harvest.
Step 4: Hang branches upside down, or lay them flat on a drying rack if you do not have hanging space.
Branch-by-branch cutting is more time-consuming, but it gives you more control and is much easier to manage in a limited drying space.
Wet Trimming vs. Dry Trimming
This is a choice you will need to make at harvest time, and it connects directly to your cutting technique.
Wet trimming means you remove the sugar leaves (the small leaves growing out of or near the buds) immediately after cutting, while the plant is still fresh. The leaves are easier to remove when they are firm and standing upright. Many growers in humid climates prefer wet trimming because it speeds up the drying process and reduces the risk of mold.
Dry trimming means you hang the branches first, let them dry, and then trim the sugar leaves afterward. This approach slows drying slightly and many growers feel it produces a smoother final product. The trade-off is that trimming dried plant material can be a bit more difficult because the leaves curl and stick to the bud.
Neither method is universally better. Your local humidity and drying space temperature will often be the deciding factor.
Drying After Cutting
Once your cuts are made, proper drying is the next critical step. Think of freshly cut cannabis like freshly cut herbs. Dry them too fast and you lose quality. Leave them in a damp, warm space and you risk mold.
The ideal drying environment has a temperature of around 60 to 70 degrees Fahrenheit (15 to 21 degrees Celsius) and a relative humidity of 45 to 55 percent. The space should have gentle airflow, enough to prevent stagnant air pockets but not so much that the buds dry out within a day or two. Direct airflow blowing straight onto the buds is generally not recommended for the same reason.
Keep the space dark or dimly lit. Light exposure during drying can degrade compounds in the plant over time.
The drying phase is done when small stems snap cleanly rather than bending, and the outside of the bud feels dry to the touch. This usually takes between seven and fourteen days depending on your conditions.
Pro Tips From Experience
Here are some things that beginners frequently get wrong, and what you can do instead.
Do not rush the harvest. It is tempting to cut when the plant looks close to ready, especially after weeks of waiting. But cutting even a week too early can make a noticeable difference in the final result. Be patient and use your trichome loupe.
Keep your tools clean. Cannabis resin builds up on scissors very quickly. Dirty tools make cutting harder and can transfer contaminants between plants. Wipe blades with isopropyl alcohol regularly throughout the process.
Do not skip the drying step. Some beginners try to speed-dry their harvest in an oven or microwave. This destroys much of what the plant has developed over its growing cycle. Slow, steady drying is always better.
Label your branches. If you are harvesting multiple plants or multiple strains, it is easy to get them mixed up once they are hanging. Use simple tags or labels on each branch as you cut.
Work in a cool room. Warmth causes trichomes to become more fragile and sticky. If possible, harvest when your grow space or working area is on the cooler side of comfortable.
Important Considerations
Legal awareness. Cannabis cultivation is legal in some places and illegal in others. Laws differ not just by country but by state, province, and municipality. Always understand the legal status of cannabis growing in your specific location before proceeding. This article is educational and does not encourage any illegal activity.
Mold prevention. Mold is the most common problem growers face during drying. If you notice any fuzzy gray or white patches on your buds during drying, it is not the same as the crystalline trichomes you were inspecting earlier. Mold often has a musty or unpleasant smell. Affected material should be removed and discarded. Good airflow and proper humidity control are the best prevention.
Personal protective equipment. Resin from cannabis plants is extremely sticky and will coat your skin, tools, and clothing. Gloves are strongly recommended. Resin on skin can be removed with oil or isopropyl alcohol.
Waste disposal. Plant material that is not kept after harvest should be disposed of in accordance with local regulations.
Frequently Asked Questions
How do I know if I am cutting at the right time?
The most reliable method is to inspect the trichomes with a jeweler’s loupe or digital microscope. You are looking for a mostly milky white color with some beginning to turn amber. Checking pistil color alongside trichome inspection gives you a fuller picture of the plant’s readiness.
Can I cut the plant in stages instead of all at once?
Yes. Many growers use a staggered harvest, cutting the upper, more mature buds first and leaving the lower branches on the plant for an additional week or more. This is especially useful on larger plants where the canopy may have shaded lower growth.
What is the best time of day to cut cannabis plants?
Many experienced growers prefer to harvest at the end of the dark cycle, before lights come on, for indoor grows. For outdoor grows, early morning before temperatures rise is a common preference. The reasoning is that plant compounds are thought to be slightly more concentrated during this period, though the scientific evidence is not definitive.
How long does drying take after cutting?
Under ideal conditions, seven to fourteen days is typical. Drying time depends on your temperature, humidity, and how large the individual branches or buds are. Smaller, wet-trimmed buds may dry faster. Always test stems for the snap test before moving to the curing stage.
What happens if I dry my harvest too quickly?
Rapid drying at high temperatures or with excessive airflow can lead to an uneven result where the outside of the bud dries while the inside remains moist. This creates conditions for mold to develop during curing. It can also affect the plant’s aroma and overall quality. Slow, steady drying at appropriate humidity is always preferable.
Final Thoughts
Harvesting cannabis is honestly one of those skills that improves naturally with practice and observation. The first time can feel overwhelming, but once you understand what you are looking for and why each step matters, it becomes a much more intuitive process.
The key takeaways are simple. Learn to read your plant before you cut. Use the right tools and keep them clean. Choose a cutting method that matches your plant size and drying space. Dry slowly in the right conditions. And above all, be patient at every stage.
Whether you are studying horticulture, researching plant science, or simply curious about how cannabis is cultivated, understanding the harvest process is a fundamental part of understanding the full lifecycle of this plant. Good luck, take it one step at a time, and do not underestimate how much a thoughtful, careful approach will pay off.
Disclaimer: Cannabis cultivation laws vary widely by country, state, and region. This article is written purely for educational and informational purposes. Always check and follow your local laws before growing any plant. Nothing in this article constitutes legal or medical advice.
This article is intended for educational purposes only. Cannabis laws vary by jurisdiction. Always comply with applicable local, state, and national laws.