Growing cannabis from seed is one of the easiest ways to understand the plant’s life cycle from the very beginning. For a beginner, starting with a seed also makes it easier to follow how the plant develops from germination into a young, established plant.
This guide focuses specifically on the early part of the growing journey — understanding the seed, germination, the seedling stage, and the basics of establishing healthy early growth.
For the complete journey from seed through flowering and harvest, see our How to Grow Cannabis: A Complete Step-by-Step Guide.
What You’ll Learn in This Guide
- How cannabis seeds begin the growth process
- What to understand before starting from seed
- What happens during germination
- What the seedling stage looks like
- What young cannabis plants need during early growth
- Common beginner mistakes
- When to move from seedling care into the next growth stage
- Where to find more detailed cannabis growing guides
Understanding Cannabis Seeds
A cannabis plant begins its life as a seed. Inside that small seed is a developing embryo containing the basic structures needed to begin growth when the right conditions are present.
When a viable seed receives adequate moisture and suitable environmental conditions, it begins to absorb water. This activates the embryo and starts the germination process.
A healthy seed may vary in appearance depending on its genetics, maturity, and variety. Seed appearance alone, however, isn’t a perfect way to determine whether a seed will successfully germinate.
If you want to learn more about seed appearance and different seed types, visit our Cannabis Seeds Guide.
What to Understand Before Starting From Seed
Before beginning, it helps to understand that successful early growth depends more on consistency than complexity.
Young plants are sensitive to major changes in their environment. Temperature, moisture, light, growing medium, and airflow all influence early development.
A simple setup is often easier for beginners to understand than a complicated one.
The main things to pay attention to are:
- A suitable growing medium
- Good drainage
- Consistent moisture without waterlogging
- Appropriate light
- Stable temperature
- Adequate airflow
- Clean growing conditions
You don’t need to understand every part of cannabis cultivation before starting. The goal is to understand what the plant needs at its current stage.
Germination: The Beginning of Growth
Germination is the process through which a dormant seed begins developing into a young plant.
When moisture reaches the seed, it begins absorbing water. The seed swells, the outer shell opens, and the first root — called the taproot — begins to emerge.
This is the first visible sign that the seed has started growing.
What Happens During Germination?
The basic sequence looks like this:
Seed → Moisture → Seed opens → Taproot emerges → Seedling develops
The timing can vary between seeds. Some may begin showing signs of germination relatively quickly, while others can take longer.
The most important thing during this stage is avoiding extremes.
Too little moisture can prevent the seed from developing properly, while excessive moisture can create an oxygen-poor environment around the developing root.
The Taproot
The taproot is the first primary root to emerge from the seed.
It grows downward and eventually develops into a larger root system that supports the plant’s ability to take up water and nutrients.
The early root is delicate, so unnecessary handling can damage it.
Once the seed has successfully germinated and established itself in a suitable growing medium, the plant can begin developing above the surface.
For a more detailed discussion of germination, see our How to Germinate Cannabis Seeds guide.
The Seedling Stage
After germination, the cannabis plant enters the seedling stage.
The first leaves you see are called cotyledons. These are different from the familiar serrated cannabis leaves that develop later.
As the seedling continues growing, its first true leaves appear.
At this point, the plant is beginning to establish both its above-ground structure and its root system.
What Young Seedlings Need
Seedlings generally benefit from a stable environment rather than aggressive care.
Important factors include:
- Consistent but not excessive moisture
- Suitable light
- Stable temperature
- Good airflow
- A well-draining growing medium
- Careful observation
One of the most common beginner mistakes is giving a young seedling too much water.
A small root system cannot use large amounts of water as quickly as an established plant. Constantly saturated growing media can also reduce the oxygen available around the roots.
How to Recognize Healthy Early Growth
A healthy young cannabis plant generally develops gradually.
You may notice:
- New leaves appearing over time
- Increasing leaf size
- A stronger central stem
- Continued root development
- More recognizable cannabis leaf structure
Growth speed can vary depending on genetics and environmental conditions, so comparing your plant with another plant isn’t always useful.
Instead, look for consistent progress over time.
Keeping simple notes about changes can also help you understand how your plant responds to its environment.
Moving Beyond the Seedling Stage
As the plant develops several sets of true leaves and establishes a stronger root system, it gradually transitions into the vegetative stage.
This is where the plant begins focusing more heavily on producing:
- Leaves
- Stems
- Branches
- Roots
- Overall plant structure
The vegetative stage is much broader than the early seedling period covered in this guide.
For the complete lifecycle, continue with our How to Grow Cannabis: A Complete Step-by-Step Guide.
Common Beginner Mistakes When Starting From Seed
Starting from seed is relatively simple, but beginners often make the same mistakes.
1. Too Much Water
More water does not automatically mean faster growth.
Young roots need both moisture and oxygen.
2. Constantly Disturbing the Seed
Checking a seed repeatedly or handling an emerging root unnecessarily can cause damage.
Patience is important during germination.
3. Too Much Light Too Early
Young seedlings don’t necessarily need the same light intensity as a mature plant.
Early growth should be monitored for signs of light stress.
4. Ignoring the Growing Medium
Poor drainage can create problems even when everything else appears correct.
The growing medium should provide both moisture retention and adequate drainage.
5. Changing Too Many Things at Once
If you constantly change watering, lighting, temperature, or other environmental factors, it becomes difficult to understand what is helping or hurting the plant.
Consistency makes observation much easier.
From Seed to Plant: The Bigger Picture
Starting from seed is only the first part of the cannabis life cycle.
The broader journey can be understood as:
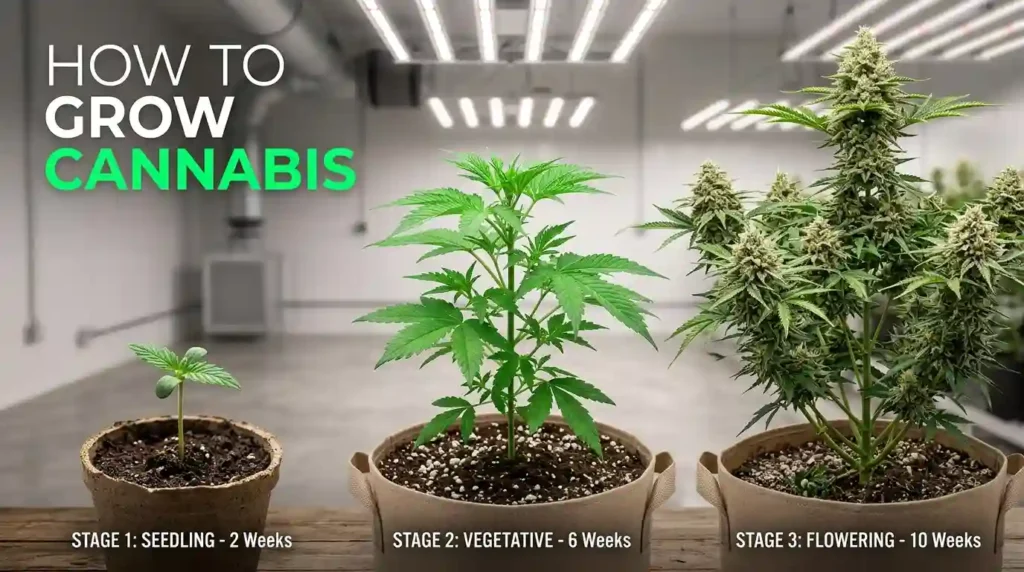
Seed → Germination → Seedling → Vegetative Growth → Flowering → Harvest
Each stage has different characteristics and requirements.
You don’t need to learn everything at once. Understanding the current stage first makes the overall process much easier to follow.
For a complete high-level overview, visit our Cannabis Growth Stages & Harvest Guide.
Frequently Asked Questions
How long does cannabis seed germination take?
Germination time can vary between seeds and environmental conditions. Some seeds begin showing a root within a few days, while others may take longer.
What does a germinating cannabis seed look like?
The most obvious sign is the emergence of a small white root from the seed. This is the taproot and indicates that germination has begun.
How do I know when a seedling has started growing?
Once the seedling emerges above the growing medium and begins developing true leaves, it has moved beyond the initial germination process.
Why are my cannabis seedlings drooping?
Drooping can have several possible causes, including excessive moisture, environmental stress, or problems with the root environment. Avoid assuming that every drooping seedling simply needs more water.
When does a cannabis plant leave the seedling stage?
There isn’t one exact day when the seedling stage ends. The transition happens gradually as the plant develops more true leaves, a stronger root system, and more substantial vegetative growth.
Should beginners start with complicated equipment?
A simple, consistent environment is generally easier to understand than a complicated setup. Beginners benefit from learning how the plant responds to basic environmental factors before adding unnecessary complexity.
Final Thoughts
Growing cannabis from seed gives beginners an opportunity to understand the plant from the very beginning.
The most important lessons during this stage are simple: be patient, avoid overwatering, maintain a stable environment, and observe how the plant changes over time.
Once the seedling becomes established, the plant enters the vegetative stage and the focus shifts toward building a stronger root system, stems, branches, and leaves.
For the complete growing journey beyond the seedling stage, continue to our How to Grow Cannabis: A Complete Step-by-Step Guide.
Educational Only · Legal Regions Only
This guide is for educational purposes and adult readers in regions where cannabis cultivation is legal. Cannabis laws vary by country, state, province, and municipality. Always check the current laws in your location before growing or handling cannabis plants.
Sources:
- Langa, S., Magwaza, L. S., Mditshwa, A., & Tesfay, S. Z. (2024). Characterization of cannabis varieties and the intrinsic and extrinsic factors affecting cannabis germination and seedling establishment: A descriptive review. Industrial Crops and Products, 208, 117861. https://doi.org/10.1016/j.indcrop.2023.117861
- Pennsylvania State University Extension. (2025). Seed and Seedling Biology. https://extension.psu.edu/seed-and-seedling-biology
- University of Missouri Extension. (2020). Germination 101. https://extension.missouri.edu/news/germination-101