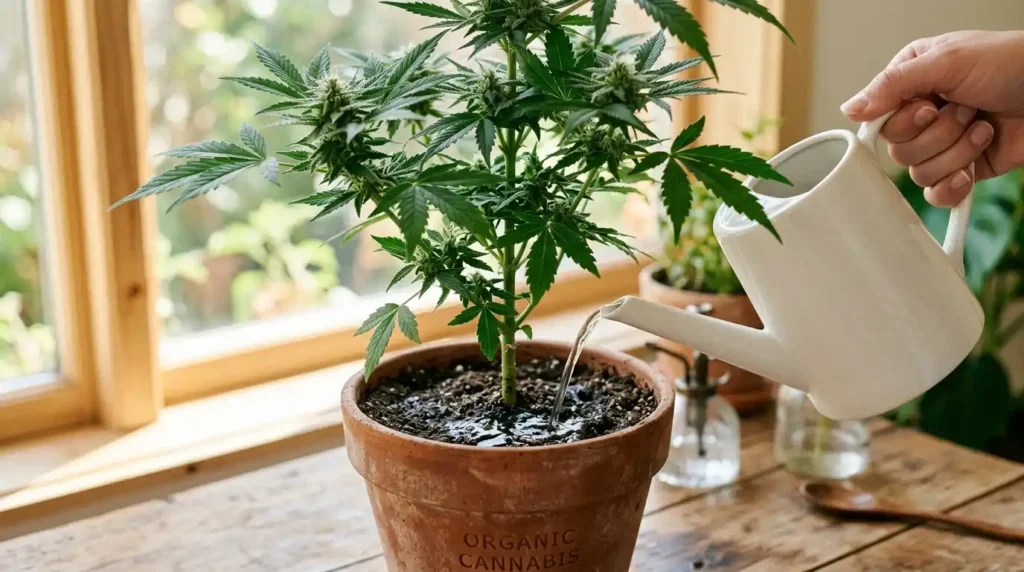
If you have been reading about cannabis plant care, you have probably come across the word “flushing” at some point. Maybe someone in a growers’ forum mentioned it, or you saw it listed as a step before harvest. Either way, you are in the right place.
Flushing cannabis plants is one of those topics that sounds more complicated than it actually is. Once you understand what it means and why growers do it, the process itself is pretty straightforward. This guide will walk you through everything — what flushing is, when to do it, how to do it step by step, and some common beginner mistakes to watch out for.
By the end of this article, you will have a clear picture of how and when to flush a cannabis plant, even if you have never done it before.
What Does It Mean to Flush a Cannabis Plant?
Let’s start with the basics.
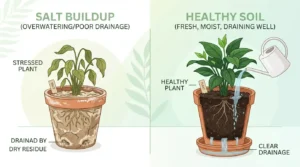
When we talk about flushing cannabis plants, we are talking about running large amounts of plain, pH-balanced water through the growing medium — whether that is soil, coco coir, or a hydroponic system — to wash away any built-up nutrients and mineral salts.
Think of it like cleaning out a coffee machine. Over time, mineral deposits build up inside the machine and affect the taste of your coffee. Running plain water through it clears things out and helps restore a cleaner flavor. The logic with cannabis flushing is similar.
Over a growing cycle, cannabis plants take in a steady supply of nutrients — nitrogen, phosphorus, potassium, and trace minerals. These are essential for healthy growth. But when excess nutrients accumulate in the growing medium, or when you want the plant to use up what is already stored inside it, flushing helps reset things.
Flushing is particularly common in two situations: before harvest, and when a nutrient problem needs correcting mid-grow.
Why Do Growers Flush Cannabis Plants?
There are a few main reasons growers choose to flush:
Before harvest: Many growers flush in the final weeks before harvest to encourage the plant to use up the nutrients already stored in its tissues. The idea is that this can affect the final product’s taste and how smoothly it burns — something that is especially important to growers who care about quality.
It is worth noting that this is a debated topic in the cannabis growing community. Some growers swear by it, while others believe flushing has little measurable impact. The science is not completely settled. What is generally agreed upon is that excessive mineral salt buildup in the growing medium is not ideal for plant health.
To correct nutrient problems: If your plant is showing signs of nutrient burn (dark, clawing leaf tips) or a lockout (where the plant cannot absorb nutrients properly because of pH imbalance or salt buildup), flushing can help clear the medium and allow you to start fresh with a more balanced feeding schedule.
When switching nutrient programs: Some growers flush between feeding stages to avoid mixing products that might interact poorly.
Understanding the reason you are flushing helps you time it correctly and do it more effectively. For a broader foundation on keeping your plant healthy throughout its life, the Cannabis Plant Care website covers everything from seedling to harvest in one place.
When Should You Flush Cannabis Plants?
Timing matters a lot with flushing. Here is a general guide based on the growing medium:
- Soil: Flush approximately 1 to 2 weeks before the estimated harvest date. Soil retains moisture and nutrients longer, so more time is needed.
- Coco coir: Flush about 1 week before harvest. Coco is a faster-draining medium.
- Hydroponics: Switch to plain, pH-balanced water in the final 3 to 7 days before harvest. Hydro systems respond quickly.
For mid-grow flushing (to address nutrient issues), you can flush at any stage, but give your plant time to recover before resuming feeding. Usually a few days is enough.
One important sign that harvest is approaching: trichomes (the tiny crystal-like structures on the buds) begin to change color from clear to cloudy or amber. Many growers use a jeweler’s loupe or a small handheld microscope to check this. Flushing at the right stage — not too early, not too late — makes a real difference.
You can learn more about growth stages and how to read your plant’s development in the Cannabis Plant: Complete Beginner to Advanced Guide, which walks through each phase in detail.
How to Flush Cannabis Plants: Step-by-Step
Here is a simple, practical process you can follow.
Step 1: Stop Adding Nutrients
A day or two before you plan to flush, stop adding any nutrients to your watering routine. This helps you get a cleaner start.
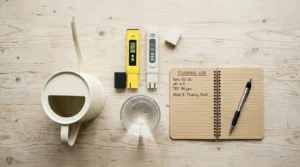
Step 2: Check and Adjust Your Water’s pH
This step is often skipped by beginners, and it is one of the most important ones. Plain tap water can be acidic or alkaline, and if the pH is off, it can cause nutrient lockout even while you are trying to flush.
For soil grows, aim for a pH of around 6.0 to 7.0. For hydro and coco, aim for 5.5 to 6.5.
Use a basic pH meter or pH test drops, which are available at most garden supply shops. You can adjust the pH up or down using inexpensive pH up and pH down solutions.
Step 3: Water Slowly and Generously
Pour pH-balanced, plain water slowly through your growing medium. You want to use roughly two to three times the volume of water compared to the size of your container. For example, if you have a 10-litre pot, you would use 20 to 30 litres of water.
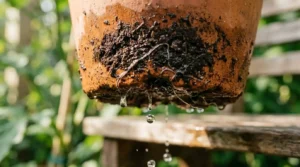
Do this gradually. Do not dump all the water in at once. Pour, let it drain, pour again. The goal is to push accumulated salts and nutrients through the medium and out the drainage holes at the bottom.
Step 4: Check the Runoff
As the water drains out of the bottom of your container, pay attention to its colour and, if you have a TDS (total dissolved solids) meter, check the runoff water’s reading.
When you first start flushing, the runoff may appear slightly yellow or brownish and will have a high TDS reading — this is the built-up minerals and salts being washed out. As you continue flushing, the runoff should become clearer and the TDS reading should drop. Most growers aim for a runoff TDS of below 150 to 200 ppm (parts per million) before they stop.
If you do not have a TDS meter, simply flush until the runoff water looks clear and consistent. That is a reliable visual guide.
Step 5: Allow the Medium to Partially Dry
After flushing, do not water again for several days. Let the growing medium dry out to a manageable level. Keeping wet soil or coco for too long after flushing can cause issues like root oxygen deficiency or mold. You want the roots to have some air.
During this drying period, keep environmental conditions stable — consistent temperature, humidity, and light if applicable to your setup.
Step 6: Monitor the Plant
After flushing, watch your plant for a few days. Leaves may begin to yellow slightly, which is normal and actually a sign the plant is drawing on its stored reserves. This is often considered a positive sign in the final pre-harvest stretch.
If you notice more severe drooping or distress, check your watering frequency and root environment.
Pro Tips from Experienced Growers
Here are some insights that beginners often overlook:
Do not flush too early. Starting the flush process too soon means the plant stops receiving nutrients before the buds have finished developing. This can reduce the overall yield. Always check trichome maturity before you start your final flush.
Room temperature water works best. Very cold water can shock roots. Use water that is close to room temperature — around 18 to 22 degrees Celsius is a comfortable range for most setups.
pH is non-negotiable. Even when flushing with “plain” water, pH imbalance can undo your efforts. This is the single most common mistake beginners make.
Flushing does not replace good feeding habits. If your plant has had consistent nutrient problems throughout the grow, flushing before harvest will not fix everything. Flushing works best when the grow has been reasonably healthy up to that point.
Outdoor plants flush differently. If you are growing outdoors in the ground, flushing is not really practical the same way. Rainfall and natural soil processes play a bigger role. Focus more on timing your last feeding correctly.
Hydroponic growers, keep it simple. In hydro, just switch your reservoir to pH-balanced plain water for the last few days. No need to dramatically increase water volume the way you would in soil.
For more foundational knowledge on keeping your cannabis plant in good shape through all its stages, take a look at the guide on How to Care for Cannabis Plants, which covers watering, nutrition, and environment in practical detail.
Common Beginner Mistakes to Avoid
Flushing too aggressively with cold water. This shocks the root zone and can cause more harm than the buildup you were trying to fix.
Skipping pH adjustment. Pouring raw tap water at pH 8.0 into a soil pot is not really a flush — it is just stressing the plant.
Over-flushing in hydro. Running massive volumes of water through a recirculating hydro system when just swapping to plain water for a few days works fine.
Confusing drooping with a flush problem. After a big flush, some leaf droop is normal because of the saturated root zone. Give it time to drain before panicking.
Flushing as a first response to any leaf problem. Flushing is best for salt buildup and nutrient lockout. If your plant has a pest issue or a disease, flushing will not help and could waste time better spent diagnosing the actual problem.
Important Considerations
Legal awareness: Before growing any cannabis plant, research the specific laws in your region carefully. Growing cannabis is legal in some areas and strictly prohibited in others. This guide is educational and does not encourage or endorse growing in locations where it is not permitted.
Water quality matters: If your tap water is heavily chlorinated or has a very high mineral content (known as hard water), consider using filtered or reverse osmosis water for flushing. This gives you a cleaner base to work with.
Container drainage: Your pots must have good drainage holes. If water cannot exit the container freely during flushing, you risk waterlogging the roots and causing oxygen deprivation.
Environment during flush: Keep your grow environment stable. A big temperature or humidity swing right when you are flushing can add unnecessary stress to the plant during an already transitional period.
Organically grown plants: Some growers who use organic soil and organic nutrients argue that flushing is unnecessary because organic growing methods do not create the same kind of salt buildup. This is a valid point — flushing is most relevant for synthetic nutrient programs.
Quick Summary
- Flushing means running plain, pH-balanced water through the growing medium to clear out built-up nutrients and mineral salts.
- The two main reasons to flush are before harvest and to correct nutrient problems mid-grow.
- Always adjust your water’s pH before flushing.
- Use two to three times the container volume in water.
- Check runoff colour and TDS readings to know when the flush is complete.
- Let the medium partially dry out after flushing.
- Do not flush too early — check trichome development before beginning a pre-harvest flush.
Frequently Asked Questions
How do you flush cannabis plants without a TDS meter?
You can flush effectively without a TDS meter by using the visual runoff method. Start flushing with pH-balanced plain water and keep going until the water draining from the bottom of the pot looks clear and consistent rather than yellowed or murky. Allow the medium to drain and dry out before your next step.
How long should you flush cannabis plants before harvest?
In soil, most growers flush for 1 to 2 weeks before harvest. In coco coir, around 1 week is typical. In hydroponic systems, 3 to 7 days of plain water is usually enough. The exact timing depends on how quickly your medium drains and how close your plant is to peak ripeness based on trichome development.
Can you flush cannabis plants too much?
Yes. Over-flushing, especially in the final pre-harvest stage, can starve the plant of nutrients it still needs to finish developing. It can also lead to root oxygen deficiency if the medium stays waterlogged for too long. Flushing is about clearing excess, not stripping everything out permanently.
What kind of water should you use to flush cannabis plants?
Plain, pH-balanced water is ideal. Avoid very cold water, as it can shock the roots. Room temperature water, adjusted to the correct pH for your growing medium (6.0 to 7.0 for soil, 5.5 to 6.5 for coco and hydro), is what most experienced growers use.
Do cannabis plants need to be flushed if you use organic nutrients?
This is debated. Many organic growers argue that their soil and nutrients do not create the same mineral salt buildup that synthetic nutrients do, so flushing is not necessary. However, if your plant is showing signs of nutrient lockout or you prefer the peace of mind of a light flush before harvest, it is unlikely to cause harm as long as pH is properly managed.
Final Thoughts
Flushing cannabis plants is a simple but meaningful step in the growing process when done correctly and at the right time. It is not magic, and it will not fix deep-rooted problems on its own, but as part of a thoughtful overall growing approach, it is a useful skill to understand.
The key things to remember are: use pH-balanced water, flush at the right time, watch your runoff, and let the medium breathe after the process. If you do those things, you are well ahead of where most beginners start.
Growing any plant well takes patience, observation, and a willingness to learn from each cycle. For a broader education on the cannabis plant — from its biology and structure to how it grows through different life stages — the Cannabis Plant: Complete Beginner to Advanced Guide is a great resource to bookmark and revisit.
Whatever your reason for being here, the goal is to grow responsibly, stay informed, and keep learning.
Disclaimer: This article is strictly for educational purposes. Cannabis cultivation laws vary widely by location. Always check and follow the laws in your region before growing any cannabis plant.