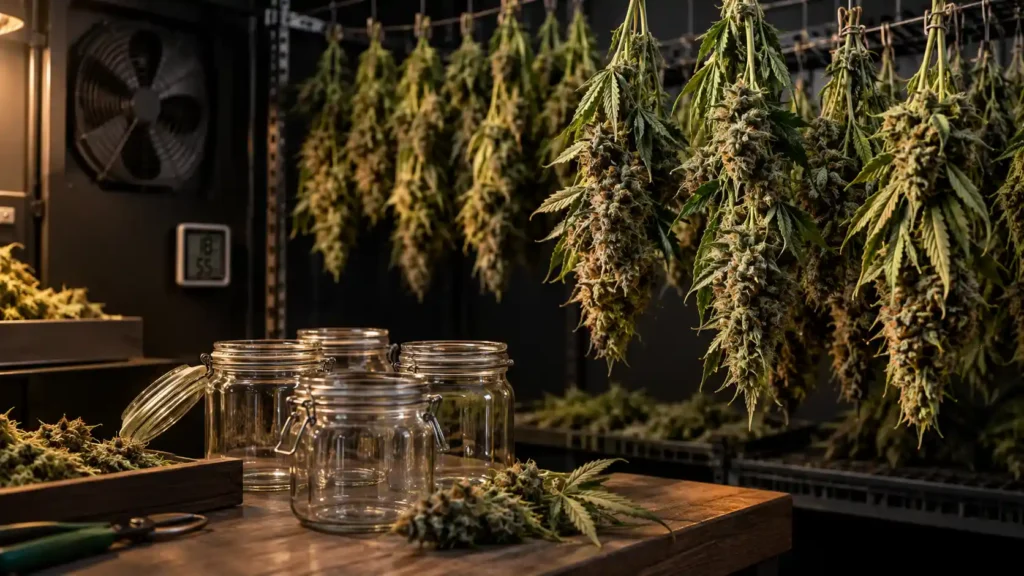
You just cut down your plant. Now what?
This is the part of growing that trips up more first-timers than any pest or nutrient deficiency ever will. Not because it’s complicated, but because it’s slow, and slow is hard to trust. You spent months watching this plant grow, and now you’re supposed to just… wait? Hang it in a closet and leave it alone for two weeks, then leave it alone again for another month?
Yes, more or less. But knowing why that waiting works and knowing what’s normal versus what’s a problem makes the whole process far less nerve-wracking. That’s what this guide covers: the actual drying and curing procedure, the environmental science behind the numbers you’ll see everywhere, and a troubleshooting section for when something looks or smells off.
Quick answer: Drying takes about 7 to 14 days in a cool, dark, well-ventilated space (60–70°F, 45–55% relative humidity). Curing in sealed jars takes a minimum of 2 to 4 weeks, though many growers continue for a month or two longer for better flavor. Skipping either step, or rushing them, is the single most common reason a home harvest turns out harsher or moldier than it should.
Drying vs. Curing What’s Actually Different
These two words get used interchangeably a lot, but they’re doing different jobs.
Drying is about removing the bulk of the water fast enough to prevent mold, but slowly enough not to wreck the flavor and potency. A freshly cut plant is somewhere around 75–80% water by weight. Drying brings that down to roughly 10–15% over a week or two.
Curing is what happens after that. It’s slower, and it’s not really about removing water anymore it’s about letting the water that’s left redistribute evenly throughout the bud, while chlorophyll breaks down and the aroma compounds (terpenes) settle into their final form. This is the step that turns “dry weed” into flower that actually smells and tastes like something.
Skip curing entirely and you’ll still have something smokeable. It just won’t be very good expect a grassy, hay-like taste and a harsher smoke, because the chlorophyll never had time to break down. Most experienced growers consider curing non-negotiable, even though technically the plant material is usable without it.
[Visual suggestion: simple two-column table contrasting Drying (goal: remove bulk water, timeline: 7–14 days, environment: 60–70°F/45–55% RH, open air) vs. Curing (goal: equilibrate moisture + develop flavor, timeline: 2–8+ weeks, environment: sealed jars, 55–65% RH)]
Before you get to either step, there’s one decision to make.
Step 1: Trim Before You Dry
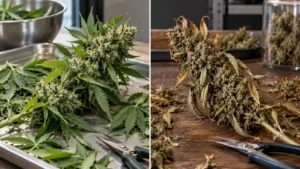
Once the plant is cut, you’ll need to decide whether to trim off the large fan leaves and excess foliage before hanging it to dry (called a wet trim) or wait until after drying to clean it up (a dry trim).
There’s no single right answer here it’s a genuine trade-off, not a beginner mistake waiting to happen.
Wet trimming removes the big leaves that hold a lot of moisture, which speeds up drying and reduces the risk of trapped moisture turning into mold, especially in dense, tightly-packed buds. The downside is that trimming wet leaves is stickier and slower work, and some growers feel it dries a little faster than ideal.
Dry trimming means you hang the whole branch, leaves and all, and trim everything once it’s dry. Some growers prefer this because the leaves offer the bud some protection during drying and the trim itself is cleaner and easier once things are crispy. The trade-off is a longer drying time, since you’re not removing the extra moisture the leaves are holding.
If you’re growing in a humid climate or you’ve got dense, tightly clustered buds, lean toward a wet trim it gives you more control over airflow. If your space is naturally dry and well-ventilated, either approach works fine.
Step 2: Drying Your Buds
Direct answer: Hang the trimmed branches upside down in a dark, well-ventilated room. Aim for 60–70°F and 45–55% relative humidity, and expect the process to take 7 to 14 days depending on how dense your buds are and how well your space controls humidity.
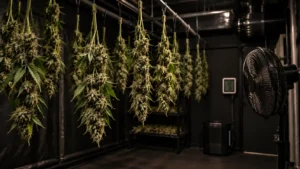
Here’s what that setup actually looks like in practice. Hang branches individually or in small, loosely spaced bunches crowding them together blocks airflow and creates pockets of trapped moisture, which is exactly what invites mold. A closet, spare room, or tent with a small fan running (pointed near the buds, not directly at them) works well. Keep the space dark; light exposure during drying can degrade the resin you spent months growing.
That 60–70°F / 45–55% RH range shows up across essentially every grower resource because it strikes a balance: warm and dry enough to prevent mold, cool and humid enough that the drying doesn’t happen so fast that it locks in a harsh, grassy taste.
It’s industry-standard practice rather than a number from a single controlled study there isn’t yet a large body of peer-reviewed research specifically on home-scale cannabis drying, something even industry researchers have pointed out publicly. Treat it as a reliable starting range, not a law of physics.
So how do you know when it’s done? The classic test is the snap test: take a small stem between your fingers and bend it. If it snaps cleanly, you’re ready to move to curing. If it just bends, it needs more time. The outside of the bud should feel dry to the touch, even though there’s still moisture trapped inside that’s expected, and it’s exactly what curing is going to finish handling.
If you check in around day 8 and the stems are still bending, that’s not a failure. Bud density, room humidity, and airflow all shift the timeline, and 7–14 days is a range for a reason.
Common mistake: rushing this step with extra fans, heat, or a dehumidifier cranked too high. Fast drying might look convenient, but it tends to lock in chlorophyll and leave you with a harsher, less flavorful final product the opposite of what curing is supposed to fix.
The same goes for any shortcut involving an oven or microwave; none of the research on cannabis post-harvest processing supports fast, high-heat drying as safe or effective, and it risks degrading both flavor and potency.
For context on how drying-stage humidity compares to what the plant needed while it was still growing, see our ideal temperature and humidity guide the targets are quite different once the plant is cut.
Understanding Water Activity (Why the Humidity Numbers Actually Matter)
This is the part most guides skip, and it’s worth the extra few minutes, because it explains why those humidity numbers exist instead of just handing them to you.
Relative humidity (RH) measures moisture in the air around your buds. But the number that actually determines whether mold can grow is something slightly different: water activity, usually written as Aw. Water activity measures the moisture available within the bud itself specifically, how much of that moisture is “free” and accessible to mold spores and bacteria, as opposed to bound up in the plant tissue.
Think of it the way food preservation works. Beef jerky, aged cheese, and dried fruit are all shelf-stable not because they’re bone dry, but because their water activity is low enough that mold and bacteria can’t get a foothold, even though the food still contains some moisture. Cannabis curing runs on the same principle.
Here’s roughly how the thresholds work, based on general water-activity science: most bacteria can’t grow below a water activity of about 0.9, spoilage molds generally stop below about 0.7, and almost no microorganisms can grow below 0.6. The ASTM International Cannabis Committee a standards body that develops technical guidelines for the cannabis industry recommends keeping cured cannabis in the 55–65% RH range, which corresponds to a water activity of roughly 0.55 to 0.65. That range sits comfortably below the mold-risk zone while staying high enough to preserve flavor and avoid over-drying.
This is also why moisture content (a simple weight-based measurement) isn’t the best way to judge dryness on its own. Cannabis loses terpenes and other volatile compounds along with water as it dries, which throws off weight-based readings. Water activity is a more direct read on actual spoilage risk.
You don’t need lab equipment to benefit from this. A basic digital hygrometer the same kind of small gauge used for cigar humidors placed inside a curing jar gives you a reasonable read on relative humidity, which is the practical stand-in most home growers use for tracking this.
[Visual suggestion: simple 0–1.0 water activity scale, marking the general mold-risk zone above ~0.7 and the recommended cannabis curing target of 0.55–0.65]
Step 3: Curing in Jars
Direct answer: Once your buds pass the snap test, move them into wide-mouth glass jars filled about two-thirds to three-quarters full not packed tight. Store the jars somewhere cool and dark, and “burp” them (open the lid briefly to swap out the air) once or twice a day for the first week, then taper off as things stabilize. Plan on curing for at least 2 to 4 weeks, though many growers keep going for a month or two beyond that.
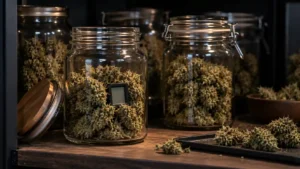
Why glass, and why that fill level? Glass is non-porous and won’t absorb odor or flavor the way plastic can, and it lets you see what’s happening inside without opening the lid.
Filling the jar two-thirds to three-quarters full leaves enough headspace for air to circulate around the buds instead of pressing them together, which matters for even moisture distribution.
Burping is simply opening the jar for a few minutes to let built-up moisture escape and let fresh air in. It sounds minor, but it’s doing real work that first week of curing releases a fair amount of moisture as the buds continue equilibrating, and letting it accumulate unchecked is one of the more common ways a cure ends up moldy.
A practical week-by-week rhythm looks like this:
| Timeframe | Burping frequency | What’s happening |
| Week 1 | 1–2 times daily, a few minutes each | Moisture is actively redistributing; jars may feel noticeably humid or “foggy” when opened |
| Weeks 2–4 | Every 2–3 days | Humidity is stabilizing; less moisture escaping each time |
| After week 4 | Once a week, or as needed | Mostly maintenance checking for problems more than releasing moisture |
If you have a hygrometer in the jar, you’re aiming for that same 55–65% RH range discussed above. Running consistently higher than that for more than a few days is worth addressing (see the troubleshooting table below); running lower generally just means your buds are on the drier side, which is a quality trade-off rather than a safety issue.
On timeline: there’s no single correct number of weeks, and sources genuinely differ here. Two to four weeks is generally treated as the minimum for a noticeable improvement in smoothness and flavor over uncured flower.
Many growers continue well past that six to eight weeks, sometimes longer reporting continued improvement, though the gains become more subtle the longer you go. Treat “2–4 weeks minimum, longer if you’re patient” as the honest range, not a fixed rule.
How to Tell When Curing Is Done
There’s no alarm that goes off. Instead, watch for a few sensory signals that tend to show up together:
- Jars no longer fog up or feel noticeably humid when you open them
- Buds feel dry on the outside without feeling brittle or crumbly
- The grassy, hay-like smell from early curing has faded, replaced by the strain’s actual aroma
- Burping the jar produces little to no change in how the buds feel
Once you’re seeing these consistently over a few checks, you’re in reasonable shape to move to less frequent burping and longer-term storage covered below.
Mold vs. Trichomes How to Tell the Difference
This is worth its own section, because getting it wrong in either direction has real consequences: consuming moldy material is a genuine health risk, and panic-discarding a perfectly good batch over a misidentified dusting of trichomes is a real (and understandably common) mistake.
Trichomes are the resin glands that coat healthy buds they look like a fine, even, crystalline dusting across the entire surface of the bud, uniform in texture and color, usually clear-to-white with an amber tint as the plant matures. They catch light and sparkle rather than looking fuzzy or cottony.
Mold, by contrast, tends to be patchy rather than uniform. It often shows up as a cottony or web-like texture concentrated in one spot frequently near the inner stem or the densest part of a bud, where airflow is weakest rather than spread evenly across the surface. It may look white, gray, or dark depending on the type, and it’s often accompanied by a musty, damp smell that’s distinct from cannabis’s usual aroma.
| Trichomes | Mold | |
| Texture | Fine, crystalline, sparkly | Fuzzy, cottony, or web-like |
| Distribution | Even across the whole bud | Patchy, often concentrated in one area |
| Smell | Normal cannabis aroma | Musty, damp, “off” |
| Where it starts | Everywhere at once | Usually the densest, least-ventilated spot |
If you genuinely can’t tell and sometimes you can’t, especially in early stages the safe move is to discard the affected bud rather than try to salvage it. Mold on cannabis isn’t something to gamble on, and one moldy bud caught early is a minor loss compared to letting it spread through a jar. For a broader look at plant health issues beyond post-harvest mold, our guide to common cannabis plant problems covers related troubleshooting.
Troubleshooting Common Drying and Curing Problems
Most issues during this stage fall into a handful of recognizable patterns. Here’s how to read them:
| Symptom | Likely cause | What to do |
| Buds still smell like hay or fresh-cut grass after curing | Cure was too short, or drying happened too fast | Keep curing longer and continue burping; if drying was rushed, there’s not much to fix retroactively note it for next time |
| Buds feel dry and crumbly, stems snap instantly with no give | Drying environment was too hot, too dry, or too fast | Nothing recovers lost moisture, but you can slow it there store in a jar with a two-way humidity pack to soften the buds slightly for smoother handling |
| Buds still feel spongy or damp days after they “should” be ready | Drying was too slow, or humidity in the space is too high | Increase airflow, check your room’s humidity, extend drying time before jarring |
| Jars still fog up heavily after 2+ weeks of curing | Buds went into jars before they were dry enough, or burping isn’t happening often enough | Increase burping frequency; if it doesn’t improve within a few more days, consider pulling buds back out for a few hours of open-air drying |
| Visible mold spotted on one or more buds | Excess moisture trapped during drying or curing, usually from overcrowding or infrequent burping | Remove and discard affected buds immediately; inspect the rest of the batch closely before continuing to cure it |
| A sharp, unpleasant smell (sometimes described as ammonia-like) | This can point to overly wet material with poor airflow, though it’s less commonly discussed than mold and worth investigating further if you encounter it | Increase airflow and burping frequency; if the smell persists or worsens, treat it the same as a mold concern and inspect closely |
Long-Term Storage After Curing
Once your buds have cured to your liking, the goal shifts from active moisture management to preservation. Sealed glass jars, kept in a cool, dark location, remain the standard approach the same qualities that made them good for curing (non-porous, easy to check) make them good for storage too.
A two-way humidity control pack (the kind that both adds and removes moisture as needed) can help keep things stable over months, without requiring you to burp jars indefinitely.
One caution worth flagging: freezing cured buds is sometimes floated as a long-term storage trick, but it’s not something the available evidence supports as a good idea. Growers who’ve tried it report that freezing can damage trichomes and reintroduce some of the harshness that curing worked to remove. Treat it as a caution rather than a recommendation room-temperature, dark, sealed storage is the more consistently reliable approach.
Frequently Asked Questions
What’s the difference between drying and curing cannabis?
Drying removes the bulk of the water quickly, usually over 7–14 days. Curing is the slower process that follows, where the buds sit in sealed jars for weeks so the remaining moisture equilibrates and the flavor develops.
How long does drying take?
Typically 7 to 14 days, depending on bud density and how well your space controls temperature and humidity.
How long should I cure my buds?
At least 2 to 4 weeks for a noticeable improvement over uncured flower. Many growers continue for 6–8 weeks or longer, since quality tends to keep improving gradually, even if the gains get smaller over time.
Do I really need to cure, or can I just dry and use it?
Technically, dried-but-uncured cannabis is usable. In practice, it tends to taste grassy and smoke harsher, because the chlorophyll hasn’t had time to break down. Most experienced growers treat curing as essential, not optional.
What’s the ideal humidity for drying versus curing?
Around 45–55% RH while drying, and 55–65% RH while curing in jars. The curing range lines up with the ASTM International Cannabis Committee’s recommended water activity target for cured cannabis.
How often should I burp my jars?
One to two times daily during the first week, then tapering to every few days as humidity stabilizes, and eventually just weekly maintenance checks once curing is well underway.
How do I know my buds are dry enough to jar?
Use the snap test a small stem should snap cleanly rather than bend. The outside of the bud should feel dry, even though some moisture remains inside.
My buds still smell like hay after curing what’s wrong?
Most often, this means the cure needs more time, or the drying stage happened too quickly. Continue burping and give it another week or two before reassessing.
Is a little white fuzz on my buds mold or trichomes?
Trichomes are fine, even, and sparkly across the whole bud surface. Mold tends to be patchy, cottony, and concentrated in one spot, often with a musty smell. When you’re genuinely unsure, the safer choice is to discard the affected material.
Can I fix cannabis that dried too fast and turned out crispy?
Not entirely lost moisture doesn’t come back on its own. A humidity pack in the curing jar can soften over-dried buds somewhat and improve handling, but the harshness from fast drying is difficult to fully reverse.
Is it okay to freeze cured buds for storage?
It’s generally not recommended. Freezing can damage trichomes and bring back some harshness, according to grower reports. Room-temperature, dark, sealed jar storage is the more reliable option.
What jars work best for curing?
Wide-mouth glass jars, filled about two-thirds to three-quarters full. Glass doesn’t absorb odor the way plastic can, and it lets you check on the buds without opening the lid.
Do I need a hygrometer, or can I just go by feel?
A hygrometer isn’t strictly required, especially for a first attempt, but it takes a lot of the guesswork out of burping schedules and helps you catch a too-humid jar before it becomes a mold problem.
The Bottom Line
Drying and curing aren’t the exciting part of growing cannabis, and that’s sort of the point this stage rewards patience over intervention.
The temperature and humidity ranges you’ll see repeated everywhere exist for a real reason, rooted in how water activity affects mold risk, even though the science specific to cannabis is still catching up to more established fields like food preservation.
If you take one thing from this guide, let it be this: when something looks or smells wrong, don’t guess and hope. Check it against the signs above, and when you’re genuinely unsure whether you’re looking at mold, err on the side of discarding it. A slower, careful cure beats a fast, anxious one every time.
For a broader look at what happens before this stage, including how to judge harvest timing itself, see our full Cannabis Growth Stages & Harvest Guide.
Note: This article is for educational purposes only. Laws and regulations related to cannabis cultivation vary by location always check your local laws before growing or handling cannabis plants.
Sources referenced:
- ASTM International Cannabis Committee water activity guidance, via Doctor Greenhouse: “Drying Cannabis: Is There a Science Behind the Art?”
- AQUALAB: “Water Activity and Cannabis”